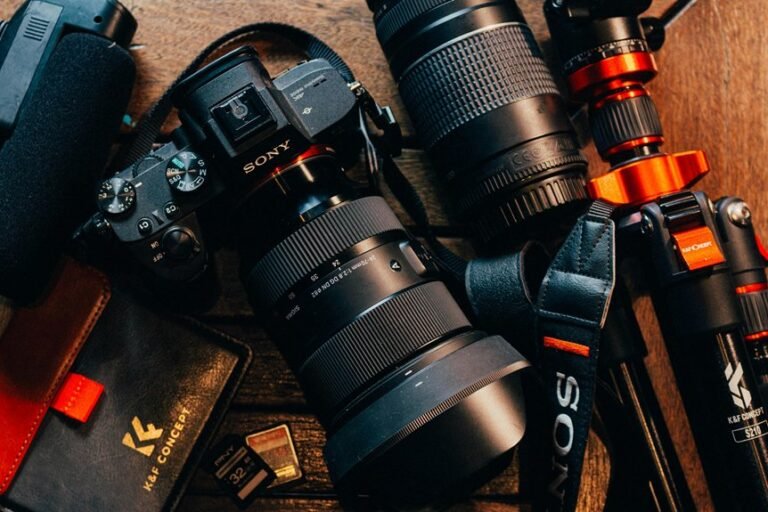
You’ll gather cameras, cables, and your phone, then power each camera and open the app to create an account and follow prompts to pair via QR code or camera ID. Start each camera near the router for a strong connection, accept permissions, and finish pairing one at a time before moving them to final spots. Plan placement and power, map coverage to avoid blind spots, tune motion and night settings, set who gets alerts, and run checks so you know what to adjust next.
5‑Minute Security Camera Setup
Start through gathering what you need and take a deep breath—you’ve got this.
You’ll begin with camera activation and a short app walkthrough. Initially plug power or Ethernet, then open the app and follow prompts to create your account. Scan QR or enter ID, accept permissions, and complete pairing.
Next consider initial placement. Position the camera near the router for setup, then aim at entry points and avoid glare or obstructions. Move it higher for wider view and closer for detail.
Should something fail use quick troubleshooting steps. Reboot power, check cables, confirm Wi‑Fi name and password, and try pairing again one camera at a time.
You’ll feel more confident after each successful step and you’re part of a helpful community.
How to Choose the Right Security Camera: Features & Budget
Choosing the right security camera feels big, but you can make it simple via focusing on a few key things that match your needs and budget. To start, consider about image quality and night vision because clear footage helps you feel safe.
Next, weigh storage options like cloud or local recording and how that affects monthly cost. Also consider smart features such as motion alerts, two way audio, and easy app access so you stay connected with family and neighbors.
For long term value focus on future proofing with firmware updates and compatible ecosystems. Check environmental durability for outdoor use and look for weather ratings and operating temperature ranges.
Finally compare warranties, customer support, and total cost over years so you buy with confidence.
Compare Wired, Wireless, and Doorbell Cameras: Pros & Cons
Whenever you’re choosing between wired, wireless, and doorbell cameras, consider about how each fits your home’s layout and your patience for setup.
Wired cameras give steady power and reliable network connections but need more planning and cabling, while wireless models are easier to place yet can suffer from signal drops and battery chores.
Doorbell cameras add convenience and live interaction at the front door, though they might need specific wiring or chime adapters and careful placement to capture faces clearly.
Wired Vs. Wireless Tradeoffs
Decide which camera type fits your home and peace of mind through evaluating wired, wireless, and doorbell options side to side. You’ll weigh reliability, power, and placement needs.
Wired cameras give steady power and consistent bandwidth so recordings stay solid. They need cables and careful installation, yet they reduce worries about signal interference and power loss.
Wireless cameras give installation flexibility and are easier to move or expand. They rely on your Wi‑Fi and can suffer from crowded networks so you might add extenders or change router placement.
Both types work with NVRs or cloud services, so consider storage, monthly fees, and how hands on you want to be. You’ll choose what fits your budget and comfort.
Doorbell Camera Considerations
You’ve already looked at wired and wireless cameras and weighed their pros and cons, so now let’s focus on doorbell cameras and how they compare to those other options. You want safety and belonging at your door. Doorbell cameras give live visitor verification and package deterrence, with two way talk so you can greet neighbors or tell a delivery person to leave a parcel safely. They often use existing doorbell wiring or Wi Fi. Choose based on power needs and integration with your system.
| Feature | Doorbell Camera |
|---|---|
| Power | Wired or battery |
| Network | Wi Fi or wired adapter |
| Alerts | Motion and ring |
| Voice | Two way talk |
| Best for | Entry point monitoring |
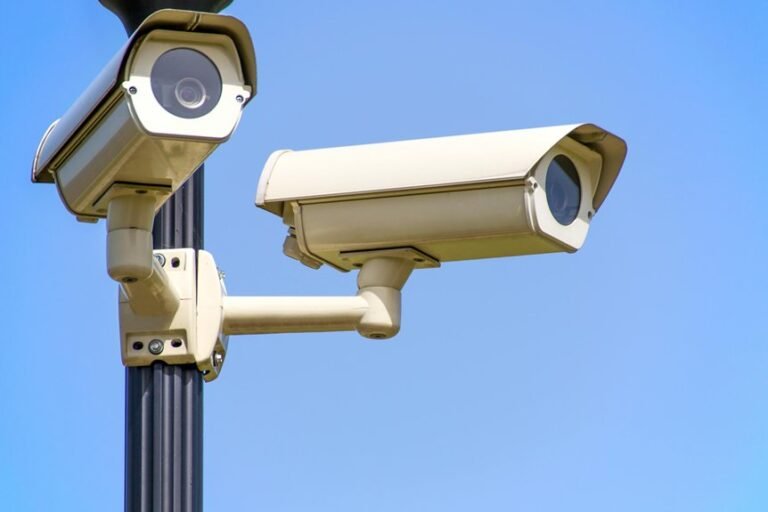
Plan Camera Placement for Full Coverage and Minimal Blind Spots
Because good coverage starts with smart planning, map your property before you install any cameras so you can spot blind spots and cover key areas without wasted devices. You’ll walk every path, porch, and yard and mark sight lines. Consider lens placement so views capture faces and license plates without harsh backlight.
Place cameras to overlap fields of view for no single blind spot. Balance your layout with garden symmetry to keep the house inviting and the system discreet. Mount some cameras higher for wide area scans and some lower for detail.
Consider entrances, driveways, windows, and common approach routes together so each camera supports the others. You’ll evaluate angles live and adjust until coverage feels complete and comforting.
Plan Power and Network: Outlets, PoE, and Wi‑Fi Range
When planning power and network for your cameras, start using walking the property with an outlet meter and your phone to map where power and Wi‑Fi actually reach, because seeing real signal strength and outlet locations saves time and headaches later. You want friendly clarity as you decide outlet placement and do power budgeting, and you’ll feel supported while you plan. Do poe planning for wired runs so you reduce power adapters and centralize feeds. Do range testing for Wi‑Fi to know where extenders or a PoE switch belong. The table below helps you pair needs and actions.
| Need | Action |
|---|---|
| Outlet placement | Mark outlets, record distance to cameras |
| Power budgeting | Sum camera draw, add margin |
| Range testing | Measure RSSI, plan extenders or PoE |
Mount Security Cameras and Secure Cables Safely
You mapped outlets and examined Wi‑Fi range, so now it’s time to mount cameras and secure cables in ways that keep your system reliable and neat. You’ll pick sturdy mounts that match your camera and surface, and you’ll mark holes, drill slowly, and use anchors for a firm hold.
Route cables through walls or in conduit to hide them and prevent snags. Seal exterior entries with silicone and use weatherproofing techniques on connectors and junction boxes. Label cables so you won’t guess later.
verify tamper detection after mounting so you know alerts work. Work with a friend when you can. You’ll feel proud when cameras sit solidly, cables are tidy, and your home looks cared for.
Connect Cameras to Wi‑Fi or a Wired Network
Start via deciding whether each camera will use a wired Ethernet connection or join your Wi‑Fi, since that choice shapes setup steps and where you can mount the device.
In case you pick wired, run Ethernet to the router or PoE switch, plug in cables, power on, and let DHCP assign IPs while you confirm links.
Should you choose Wi‑Fi, set the camera near the router, use the app to enter credentials, then move and power the camera once paired.
Watch for signal interference and try relocating the router, adding extenders, or adjusting antenna orientation.
Provided you have a mesh network, use mesh troubleshooting like moving nodes or forcing a single gateway.
Find each camera IP and examine network access before final placement.
Configure Recording, Storage, and Motion‑Detection Settings
Now that your cameras are on the network and reachable, it helps to set up how they record, store footage, and react to motion so you actually get useful video whenever you need it. Start by choosing continuous, scheduled, or motion-triggered recording. Continuous captures everything but uses more space. Scheduled limits recordings to times you care about. Motion-triggered saves space and centers significant events.
Next, pick storage: local SD card, NVR, or cloud. Use archive rotation so old files are deleted or moved automatically and you never run out of space.
Then tune motion settings. Adjust sensitivity zoning to focus on doors, paths, and driveways while ignoring trees and roads. Examine settings, watch sample clips, and adjust until the alerts feel right for your household.
Set Alerts, User Access, and Privacy Zones
Setting clear alerts, assigning user access, and drawing privacy zones together keeps your system useful without feeling intrusive. You’ll choose who gets notifications and why, so neighbors, family, or a small team can feel safe and included.
Start by setting alert sensitivity for motion and schedule quiet hours. Then create access tiers so everyone has the right level of control. Give admins full settings, trusted users view and playback, and guests limited live view only.
Next, draw privacy masks over windows, bedrooms, or neighboring yards to respect boundaries and reduce false alerts. Trial each account and mask together to confirm alerts reach the right people.
Keep talking with your group and adjust settings as needs change so everyone stays comfortable.
Test Coverage, Night Vision, Alert Accuracy, and Troubleshoot
Start mapping each camera’s coverage so you can see blind spots and overlap, and mark where you need clearer views.
Next, trial and tune night vision settings while checking IR range and glare so faces and license plates stay readable in low light.
Then run motion alert trials and adjust sensitivity and detection zones to cut false alarms, troubleshooting any persistent issues as you go.
Test Coverage Mapping
Before you run a full trial, walk each camera’s planned field of view and envision the paths someone could take, because good coverage starts with clear sightlines and realistic movement patterns. You’ll make a simple coverage heatmap, then do a blindspot audit together with family or neighbors so everyone feels safe and included. assess at day and night, trigger alerts, and record where alerts misfire so you can tune sensitivity.
| Area | Best Angle | Notes |
|---|---|---|
| Front door | 45 degrees | Watch steps and porch |
| Driveway | Wide view | Capture vehicle approach |
| Backyard | Low and high | Check gates and fences |
If something fails, reboot camera, check cables, or adjust mount and reassess immediately.
Night Vision Tuning
As you adjust night vision, picture like someone who could pass past your house after dark, and ask what you’d need to see to feel safe.
You’ll check IR sensitivity initially to avoid glare from nearby lights or reflective surfaces. Lower sensitivity if headlights or porch lights wash out the scene. Raise it to reveal faces farther away.
Next, set the IR cutoff so the camera switches cleanly between day and night modes without flicker. Try at different times and distances while a friend walks common paths.
Should motion triggers false alerts from trees, shift aim or soften sensitivity and adjust detection zones.
Whenever troubleshooting, swap lenses, clean glass, and update firmware. You’re creating a reliable, shared watch that keeps everyone calm.
Alert Accuracy Calibration
You tuned night vision so people show up clearly and your camera stops flickering at dusk, and now you want the alerts to match that clarity. Start by doing sensor calibration in the app or web UI.
Walk through sensitivity sliders and detection zones while a family member walks common paths. Lower sensitivity near trees and roads to cut false positives, and tighten zones to frame only doors and drives.
Test at night and day to make sure settings hold under different light. Use schedule rules so alerts run whenever you need them and pause whenever you don’t.
Log each change and jot results so you can undo steps that add noise. You’ll feel more confident being aware alerts reflect real activity and include people you trust.
Frequently Asked Questions
Can Installers Access Camera Feeds Remotely Without Owner Consent or Notification?
Yes. Installers can obtain installer-level access and view cameras remotely if you give them credentials or leave network ports or DDNS enabled. Protect your privacy by retaining control of the account, replacing any factory passwords, enabling access and motion notifications, and removing or disabling the installer account when the work is finished.
What Legal Permits Are Needed for Recording Audio in My Neighborhood?
Recording audio in a neighborhood requires following specific consent statutes and any applicable search-warrant rules; you must not surreptitiously record private conversations, so obtain clear permission or review local law to ensure compliance.
How Do I Securely Dispose of Old Cameras With Stored Footage?
Perform a factory reset, then securely erase remaining data by overwriting storage or using the manufacturer’s wipe utility. Remove memory cards or drives and either physically destroy them or use certified electronic recycling and refurbishment services. Destroy any printed records that contain sensitive information. These steps help protect others’ privacy and keep your community safe.
Can Cameras Be Configured to Automatically Delete Old Recordings for Privacy?
Yes. Enable automatic overwrite or scheduled deletion in your NVR, DVR, or camera app, then set a specific retention period and a regular pruning schedule so team members know recordings are removed according to that policy.
Will Smart Home Assistants Share Camera Footage With Third‑Party Skills?
Do not assume assistants will never share footage; third party access is determined by the specific permissions each skill requests, so review and restrict those permissions to keep who can view your camera feeds under your control.